How to improve font rendering on Arch Linux
Make fonts look better on your Arch Linux with a few steps. Useful for any DE.

Note: I originally wrote this article in Spanish. I’ve now translated it to English, but the screenshots are still in the original language.
One of the main caveats of KISS systems like Arch Linux comes from their own nature, because due to not having anything configured out-of-the-box, it’s us who have to take care of adjusting every detail.
An example of this is the one concerning the display of fonts, because after installing Arch you may have noticed that the fonts don’t look particularly well (while others look outright horrible), unlike out-of-the-box systems like Ubuntu where they look beautiful from the start.
I’m now going to show you what I did to solve this issue.
-
The first step will be to get rid of the Xorg fonts in case of having them installed:
# pacman -Rns xorg-fonts-75dpi xorg-fonts-100dpi -
Then we’ll install these packages from the official repositories:
# pacman -S artwiz-fonts ttf-bitstream-vera ttf-cheapskate -
Now we’ll uninstall the predefined packages for font rendering:
# pacman -Rdd fontconfig freetype2 -
And we’ll replace them with the packages from Ubuntu and Microsoft (haters: just don’t) that are found in the AUR. Assuming that you use Yaourt the command would be this:
$ yaourt -S fontconfig-ubuntu freetype2-ubuntu ttf-ms-fonts - We have almost finished, now it’s just a matter of enabling Antialias, configuring a Slight hinting, and setting sub-pixel geometry as RGB. We can do all of this with one of the following three methods:
- Using the app for customization of fonts corresponding to your desktop environment (GNOME, KDE, Xfce, and LXDE have each their own).
-
Installing LXAppearance, the customization app from LXDE (
# pacman -S lxappearance), and setting the options like this: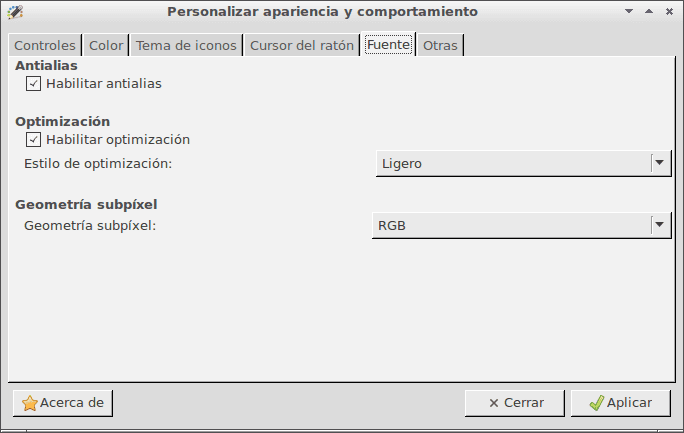
- Via a text file. In your home folder, create a file called
.fonts.confand paste the code you’ll find in this link.
-
Now we’ll delete the font cache:
# fc-cache -f -v - And now it’s just a matter of logging out and back in to apply the changes.
If everything went well, we’ll go from something like this:

To something like this:

I hope it’s useful, and if you know of any other method, don’t hesitate to share it in the comments. 🙂


